Another new day in another week! How are you guys doing? Hope you all had a nice weekend and all are fully charged now for the new week’s work.
As a video fan, I’ll always try to find some topics and share with you.
Previously I have introduced how to download SWF files with Moyea Flash Download which is a free attached downloader in Moyea SWF to Video Converter Pro. And then how to convert SWF files to other video, audio and image formats with the above-mentioned Moyea SWF to Video Converter Pro.
In Moyea SWF to Video Converter family, there is also another counterpart called Moyea SWF to Video Converter Std and that’s our topic today.
In general, Moyea SWF to Video Converter Std has all the functions that Pro does: it can convert SWF files to many other video formats like AVI, MPEG, MOV, FLV, 3GP movie (3GPP/3GPP2), MP4 (iPod video, iPhone video and PSP movie), WMV (Zune movie and Pocket PC movie), audio formats like MP3 and image formats like Animated GIF, JPEG, GIF, PNG, TIFF, BMP, etc. However, you have to be aware that “to convert SWF to Video with alpha” and “to Crop Video” is NOT available in Moyea SWF to Video Converter Std and that’s the only difference between the two.
Ok, then let’s have a look at the tutorial below on how to convert SWF to Video with Moyea SWF to Video Converter Std.
Step 1: Simply click here to download Moyea SWF to Video Converter Std, click "Browse" and then choose “From Folder” from the drop-down menu to input SWF files.
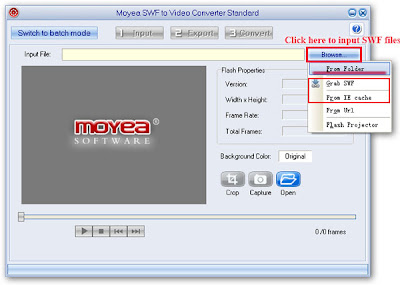
Note 1: Please refer to my previous blog “How to download SWF files?” to see how to input SWF files by “Grab SWF” and “From IE cache”.
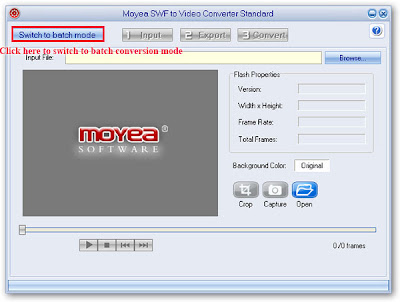
Note 2: The first time you open Moyea SWF to Video Converter Std, the default conversion mode is "Single Mode", if you have many files to convert, it is recommended to choose "Switch to batch mode" on the top left.
Step 2: After inputting, you will find the properties of input source file on the right panel.
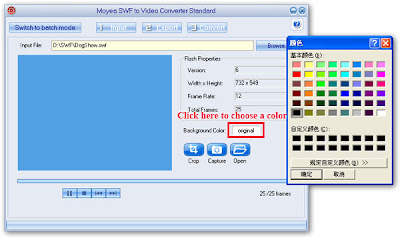
a. Click "Original" to choose a background color.
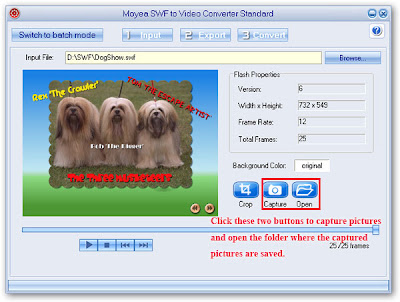
b. Click "Capture" to capture your favorite pictures while playing video and then click "Open" to open the folder where the captured pictures are saved automatically.
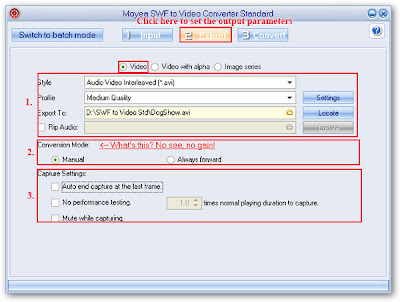
Step 3: Click "Export" tab to set the parameters for outputting.
a. Choose to generate video.
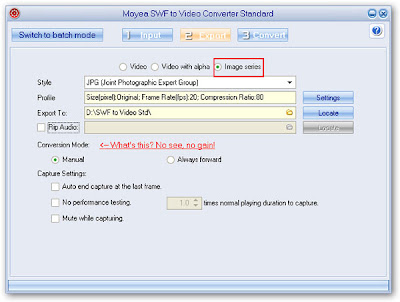
1. Select a style, profile and destination folder. Click" Settings" for advanced settings and check the box before "Rip Audio" to save the background music in another separate folder.
2. Select a Conversion Mode: There are two conversion modes: Manual or Always forward. Select "Manual", you can interact in the conversion process by setting the capture starting and ending points. Click" What's this, No see, no gain!", a window will pop up and give you more information about manual conversion mode. Select "Always forward", you can't interact in the conversion process, and the program always captures forward the SWF file, it is helpful for Flash Game which interacts with people.
3. Capture Settings: Check " Auto end capture at the last frame", the program will stop capturing at the last frame automatically, this is activated automatically when you have chosen "Always forward" conversion mode.
Check "No performance testing" to set the speed, or just keep the default 1.0. If you change the default value, "Mute while capturing" will be activated automatically.
Check "Mute while capturing", then it will be silent when capturing.
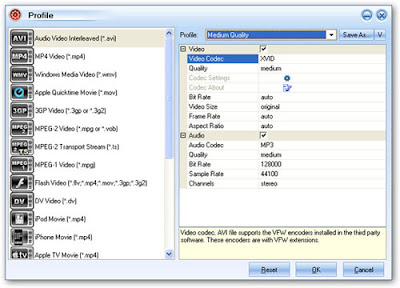
Advanced settings for video.
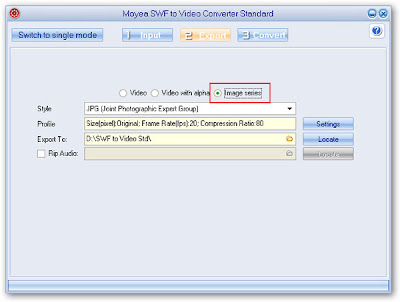
b. Choose to generate image series.
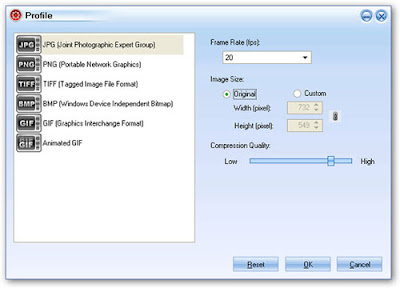
Advanced settings for image series.
Step 4: Click "Convert" tab then there will be an interface for your conversion where you can see several buttons including "Option", "Play and Capture", "Play Movie", "Start Capture", "Snapshot" and "Finish".
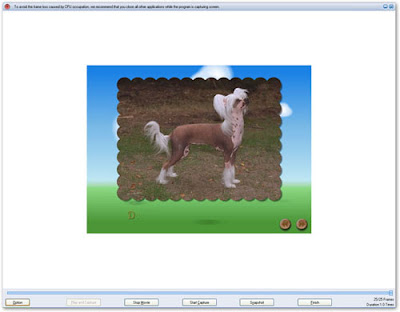
Hit on "Option" button, there are two choices: Performance testing and Stopped frame.
Click "Performance testing", interface below for you to set the working folder will pop up. Set the working folder or just keep the default. To guarantee an accurate result, you are suggested to interact with the flash when it asks you to.
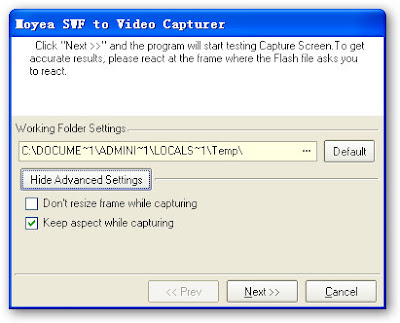
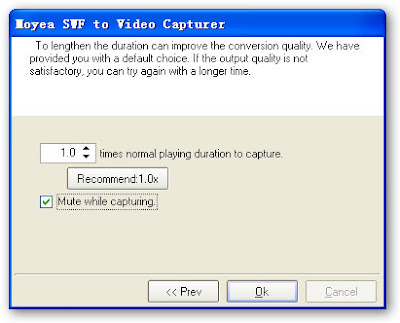
Click" Next>>", a bar showing the progress of performance testing appears. After the performance testing is finished, the interface below for you to set the screen capturing speed pops up. Set the speed, or just keep the default. Check the "Mute while capture" box for silent capture. Click "OK"to finish the testing.
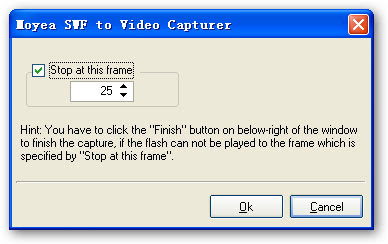
Click "Stopped frame", the interface below will pop up. Check "Stop at this frame" and set the frame, then the program will stop capturing at this frame.
Play and Capture: click this button, the SWF file will be played. Meanwhile, the program captures the files.
Play Movie: Click this button, the SWF file will be played while not being captured.
Start Capture: This button is available when there is SWF file being played. If you want to convert part of the SWF file, you can click this button when it comes to the specified part.
Snapshot: Click this button, you can capture the specific picture.
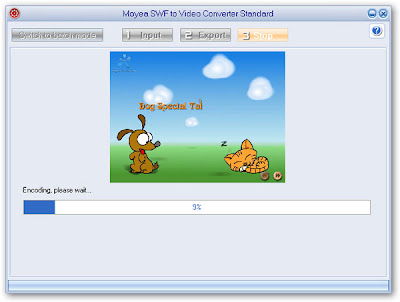
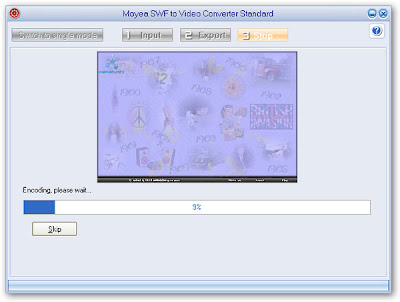
Finish: Click this button to stop capturing. After finishing capture, the program starts encoding process. Confirm the "Conversion Success" and the output folder will pop up automatically. Now it's the time to enjoy.
So far, the above instructions are all about single mode conversion, and this converter can also convert files in batch mode way which will definitely saves a lot of time and energy for you. Below are the illustrations on how to batch-convert files.
Step 1: Open Moyea SWF to Video Converter Std and then click "Switch to batch mode" on the top left to switch to batch conversion mode.
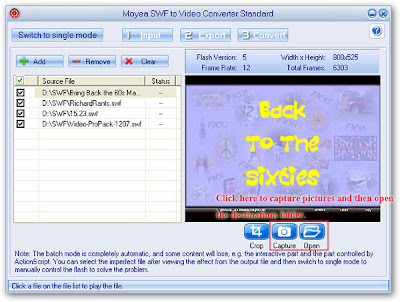
Step 2: Click "Add" to input SWF files and double click each file's name to have a preview on the right screen. Click "Check All" to select all the files that to be converted.

Note 1: As batch mode is default with the automatic conversion mode, some of the interactive or AScript controlled flashes with few frames may not be processed perfectly. It is recommended to shift this kind of files to "Single Mode" to convert under "Manual Mode" for a better result.
Note 2: In batch mode conversion, the water mark set will be added to all SWF files automatically.
Step 3: The same as Single Mode, click "Capture" and "Open" to capture pictures and then open the destination folder where the pictures are saved.
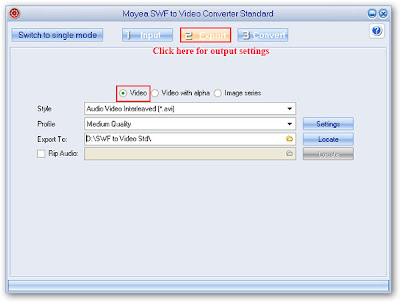
Step 4. Click "Export" for output settings.
All are the same as the "Single Mode", except that you don't have to select conversion mode as well as capture settings, because batch mode is default with "always forward conversion", performance testing is played and the capture is silent by default, moreover, the program stops capturing at the end frame by default too.
Step 5. Click “Convert”, then the program will start to test the screen capturing speed, and encode one by one. Through this process, you can only set the end frame of each file by clicking the "Finish" button in the bottom toolbar.
Confirm the "Conversion completed" and now it's time to enjoy.
No matter you choose Pro or Std, we will always provide you with the best quality and the unforgettable experience.
Moyea, always gives you exactly what you want!


No comments:
Post a Comment